analytics

Showing posts with label Baking. Show all posts

Wednesday, December 14, 2022

Gluten Free Brown Butter Coconut Blondies

These take a few extra steps to make, but are worth it. Seriously browning the butter is a great way to almost always improve your baking. The other extra step is soaking the coconut in sweetened condensed coconut milk for added flavor and soft-cookie texture. You must use a parchment sling to get these dudes out of the pan. You are making basically one giant cookie that will want to stick to the edges, cooking spray is not enough. 

As with most cookies, the goal is to NOT develop gluten, so its a forgiving recipe for any 1:1 gluten free flour blend. The only I wouldn't use is one that has pea flour or chick pea flour - since it sometimes overtakes desserts.

This is a modified double batch version of Fifteen Spatula's Brown Butter Toffee Blondies. 


Gluten Free Brown Butter Coconut Blondies

9"x13" pan
parchment paper
cooking spray
rubber scraper/spatula
350F oven

1 cup unsalted butter
1.5 cup unsweetened shredded coconut
1 can, 11.25oz of sweetened condensed coconut milk
2 cups packed brown sugar  
4 large eggs
1 TBSP vanilla extract
2 cups of gluten free flour blend (with xanthan gum or psyllium husk)
1.5 tsp baking powder
1.5 tsp salt
1 cup of unsweetened flaked coconut
1-2 tsp flaky sea salt

1. In a sauce pan, brown the butter over medium heat. Remove from the heat and put into a stand mixer. 
 
2. Put the sweetened condensed coconut milk in the warm pan with the shredded coconut. Warm over medium heat for 5-10 minutes. Turn off the heat, cover. (you are steaming the coconut to soften it)
 
YOU CAN TAKE A BREAK HERE - and let everything cool and come back after. Otherwise you really want to make sure that the coconut and brown butter are not hot before adding them to the mix. If you push it, you could scramble the eggs.

3. Line your baking pan with parchment paper slings and cooking spray.

4. Once the brown butter has cooled a bit - put your hand on the side of the mixer bowl - if it is HOT, you need to wait. If it is warm, you are good to add the brown sugar and mix.

5. Once the brown sugar is mixed in thoroughly, add in the eggs and vanilla. Mix well. 

6. Scrape down the bowl and mix again. 

7. Add in the baking flour, baking powder, salt. Mix well. 

8. Scrape down and mix again. 

9. Add in the cooled shredded coconut / sweetened condensed coconut mix. Mix well.

10. Spread into lined baking pan. Use a spatula to level. 

11. Sprinkle flaked coconut and flaky sea salt. 

12. Bake at 350F for 35-50 minutes, until a toothpick inserted comes out cleanly.

13. Allow to completely cool in pan. Remove from pan and slice.
Monday, July 9, 2018

gluten free, dairy free hot cross buns

This is the closest I have come to a dairy-free brioche! I modified my brioche recipe to make a Greek Easter Bread and Hot Cross Buns. It worked well and my only complaint is that the buns/bread deflated a bit post-cooling. I would add a bit of psyllium husk next time and see if that helped create a more robust crumb. 

The buns were stellar, the Greek Bread had too much lemon oil, so I think it could work well if you just omitted that one pesky ingredient. This technique doesn't require an overnight proof, but I find it easier to work with dough that has rested and had the time to build it's yeasties, especially if it is cooler out. (The extra yeast also means more flavor, so if you can let this sticky mess rest!)

 dairy-free brioche dough
1 1/4 cup sweet rice flour
1/2 cup tapioca starch
1 cup arrowroot
1 1/4 cup corn starch
1 cup millet flour
3/4 cup potato starch
2 tbsp yeast
1 tbsp kosher salt
2 tbsp xathan gum
2  3/4 cup almond milk cup water
1/2 cup honey
4 eggs
1 cup canola oil

1. Combine all the dry ingredients in a mixing bowl, with the paddle attachment at the ready. 
When you are ready to bake your bread(s) preheat the oven to 350F
**

2. Combine all the wet ingredients into a separate bowl and mix them until they are incorporated. 
3. With the paddle attachment on the lowest setting, gently mix the dry ingredients. Slowly pour in the wet ingredients.
4. Once all of the wet ingredients have been added in, turn the mixer up to high and mix for at least 5 minutes, stopping at least 2x to scrape down the bowl. 
The dough is going to be very very sticky and look quite wet. 
5. Cover the dough with plastic wrap and refrigerate overnight.

6. Punch down the dough, divide it into 2 bowls, add in your flavorings. 
7. Shape the dough - since the dough is so soft and sticky a disher is the best for this
8. Allow it to proof - this is going to take 20-60 minutes depending on size and temperature of your house. 
9. Bake at 350F until golden brown and cooked through (~30min)

Greek Easter Bread add-ins
2 tbsp lemon zest
1 tsp lemon oil (this was too much, should omit)
1 tbsp lemon juice


**
hot cross bun add-ins
1/4 cup chopped dried fruit
1 tbsp extract di sicily*
1 tbsp orange zest
1 tbsp orange juice
1 tsp lemon juice
*I not so secretly tried to recreate the flavors of panettone, so not super traditional, but they tasted great!


Hot Cross Bun Icing - 1/2 cup powdered sugar, a few drops of vanilla extract, and a few drops of coconut milk until it just comes together. You want to squeeze it onto the buns while they are still warm. 

Monday, June 2, 2014

cherry almond butter cookies that will blow your socks off

I was invited to a party where the host cannot eat dairy or cane sugar. Not wanting to disappoint - and knowing the crowd was a pretty open-minded bunch of heck-yeah-I-will-try-a-new-weird-food people, I thought I would attempt a dessert. No gluten, no grains, no sugar, no butter, no problem. These cookies were a giant hit. 

I basically made a modified version of The Ambitious Kitchen's Flourless Almond Butter Dark Chocolate Chunk CookiesThey are on the cakey-side of cookies, but who cares because they taste awesome and don't have a gritty or weird texture. I am not so subtly looking at you coconut oil and rice flour cookies of sadness


Cherry Almond Butter Cookies
1 cup creamy almond butter
4 dates (pitted)
1/4 cup maple syrup
1 egg
1/2 tsp kosher salt (plus more to sprinkle on top if you like)
1/2 tsp baking soda
1 tsp vanilla extract
1 tsp almond extract
1/4 cup chopped dried cherries
1/4 cup pistachios 

preheat oven to 350F 


1. In a mixer with a paddle attachment combine the almond butter, dates, maple syrup, egg, salt, baking soda, and extracts. Beat on medium speed for 1 minute.

2. Scrape down bowl, beat again for another minute. 
3. Stir in the cherries and pistachios
4. Spoon out 2-3tsp portions of the batter onto lined cookie sheets (parchment is your best bet here). 
5. Bake at 350F for 7-12 minutes
6. Remove from the oven and allow to cool for 10 minutes on the cookie sheets, then you can transfer them to a cooling rack. 

These things taste so so so so good, but they will stick together if you stack them in a Tupperware - you have been warned.

Tuesday, September 24, 2013

the very best gluten free pumpkin bars


I am not one for gloating, but hear me people when I say that I have made the most delicious pumpkin thing ever! (The picture doesn't do it justice - these treats survived the worst public transit could throw at them this morning and still provided joy to others.)

Do you remember when I totally tried to pull of a failed pumpkin bread recipe and call it a "brownie"? We can laugh at that now, because with a few tweaks, that recipe has sprouted a new MOST GLORIOUS food.

Oh yes I did cut them into parallelograms. On-the-bias slices might just be tastier. Don't even think about asking me if one could put chocolate chips in said recipe. Chocolate has no place here. Stop trying to put chocolate on/in everything! Chocolate is good, but it overwhelms squashes in general. While I cannot stop you from mucking about in your own kitchen, I am going to pause and stare-you-down towards the right decision.

Ok, put the bag of chips down, and pay attention.

These guys are spicy, not in the chili pepper way, but in the loads of wonderful, intense spices that make this a borderline spice bar. If you are a traditionalist - aka boringmouth - you can half the spices and you will still have a good pumpkin bar. But why settle for good when you can have the best square of pumpkin in the world? (Seriously, why would you?)

gluten free pumpkin bars
1 stick unsalted butter (aka half a cup)
1/2 cup brown sugar
1/2 cup white or cane sugar
2 eggs
1/2 cup millet flour
1/2 cup brown rice flour
1/2 cup hazelnut meal
1/2 tsp baking soda
1 tsp baking powder
1/2 tsp xanthan gum
1 tsp salt
1 1/2 tsp Ceylon cinnamon
3/4 tsp Vietnamese cinnamon
1 tsp ground ginger
1/2 tsp ground allspice
1/2 tsp ground nutmeg
1 tsp ground cloves
1/2 tsp ground coriander
2 tsp psyllium husk
15oz (canned) pumpkin

Preheat oven to 350F
1. Cream the butter and sugars. You aren't going to fluffy, but you want to take it past the point where it is a ball of grit hanging on to your mixer, to a smear of stuff coating the mixing bowl.
2. Add in each egg, one at a time. Mix till it is thoroughly incorporated.
3. Combine all of the dry ingredients in a separate bowl.
4. Pour half of the dry mix into the butter/sugars/egg mixture and combine. Add half of the pumpkin to the bowl and combine. Repeat.
5. Bake in a 9x13x3 inch baking dish at 350F for 25-40 minutes depending on the awesomeness of your oven. You want to be able to insert a stick into the center and have it come out clean.
6. Cool.
7. Cut and enjoy! 

Wednesday, July 11, 2012

Gluten Free Buttermilk Biscuits


They really should not work. Light, fluffy, buttery, biscuits are a thing of beauty, that seems to defy gravity. They are made with some of the richest, densest ingredients, but the end result - when they are good - is ethereal. Ok, I sounds like a commercial, but come on. You know when you break into a REALLY good biscuit that it is something at least a little magical. Little domes of goodness can couch savory or sweet - or both! They can be a delicious side, or a whole meal. There is really little a fantastic biscuit cannot do. So without much more floral language, I give you the very best gluten-free biscuits...

Gluten Free Buttermilk Biscuits
1 tbsp sugar
3/4 cup glutenous rice flour
1/4 cup potato starch
1/2 cup arrowroot starch
1/2 cup corn starch
1/4 cup tapioca starch
1 tsp xanthan gum
1/2 tsp salt (double if you are using unsalted butter)
3 tsp baking powder
1/2 tsp baking soda
8 tbsp very cold butter, cut into cubes
2 eggs
3/4 cup buttermilk

Preheat the oven to 425F
Have 2 baking sheets, lined with parchment, and an ice cream scoop at the ready
1. Combine all of the dry ingredients in a bowl, set aside.
2. In a separate bowl or liquid measuring cup, whisk the eggs and buttermilk together. Set aside.
3. Cut the butter into the dry ingredients, the goal is for pea-sized bits of butter throughout the mixture.
4. Pour the liquids into the butter/flour mix and mix until combined. (You don't want to over mix - not because of gluten - but because you don't want to beat up or melt the butter)
If the batter is sticky, that means you are doing it right. These are "drop" biscuits, which mean you literally drop the dough onto the baking pan rather than rolling and cutting them like scones. 
5. With the ice cream scoop (1-2oz, your choice), drop the biscuits onto the cookie sheets. Allow 1-2 inches of room for them to spread.
6. Bake at 425F for 8-20 minutes. Basically you are looking for them to nearly triple in size and brown evenly. This bake time is going to depend on how big you make the biscuits.
As they bake, you are going to see some butter melting and oozing out. This is OK and normal and is a sign of the deliciousness that is to come.

If you happen to have leftovers (ha!) they make great strawberry shortcake bases.


Sunday, July 1, 2012

Gluten free pumpernickel


"Wait, you can eat this?!"
"I would believe you if you said they didn't have wheat in them, but NO RYE?!"

These are the sounds of success.

It is great when people kindly nod their heads and say that your gluten free offering is "not bad" or "pretty good" but when you can pull the preverbial wool over their tastebuds, well then I know I have won.

I have been messing around with recreating pumpernickel ever since I found teff flour in an Ethiopian mini-mart in Maryland. Now back in Boston, it is a bit harder to find, but the Bob's Red Mill teff flour stuff is pretty close. It is significantly less fermented, so it smells different and requires more yeast - or a longer proofing time - to get going.

This recipe was hard to post and share since a very dear friend, who has passed, helped me develop and perfect it. It was around her dinner table, where so many amazing meals were had, where we discussed what this recipe needed: cocoa, coffee, and molasses. Those three ingredients took this from good to great. I will think of her lovingly every time I make a batch.

Gluten free pumpernickel
2 1/2 cups teff flour
1/4 cup cocoa powder
1/2 cup arrowroot starch (+ 1/2 cup in reserve)
1/2 cup rice flour
3/4 cup millet flour
1/4 cup brown rice flour
1 tbsp caraway seeds (optional)
1 tbsp kosher salt
1 tbsp psyllium husk
1 tbsp flax seed meal
1 tsp xanthan gum
1 tsp espresso powder
2 tsp instant yeast
3 cups water
1/4 cup oil
1/4 cup molasses


1. Combine all of the wet ingredients, and yeast, into a mixing bowl.
2. Combine all of the dry ingredients.
3. On very low speed, slowly add the dry ingredients into the wet.
4. Mix to combine.
5. Allow the mixture to sit for 20-30 minutes (overnight is even better). You are looking for the batter to go from a chocolate pudding consistency to something almost as thick as warm frosting. 
6. Now comes the tricky part. If you let it rest for 20-30 minutes you are going to need to see if it has set up enough. Again, you are looking for it to be much thicker, and fall off in plops off the beater or paddle. If it is a bit runny, slowly mix up to 1/2 cup more arrowroot starch. If this scares the baking pants off you - just cover the mixture with plastic wrap and put it in your fridge over night, and skip to #7.
7. Preheat the oven to 425F.
8. Grease 2 muffin tins.
9. Scrape down the batter, and then scoop it into the muffin tins (22-24)
10. Bake at 425F for 30-45 minutes, or until you can pierce the rolls with a toothpick and the center comes out clean.
11. Cool and eat!

This is a bad photo, but you can see the awesome crumb structure and that they do not deflate. I recommend serving them with butter and salt, goat cheese - I am not in any way suggesting you should forgo the pastrami.

Tuesday, June 5, 2012

gluten free lemon poppyseed muffins

These are almost ready for prime time. I will keep you updated with a recipe for round two.


Tuesday, May 22, 2012

nutella rice krispie treats


Sometimes great ideas happen because of an expected set of events converge. Gluten free rice krisipies go on sale. A friend comes to town. One has less than half a jar of Nuttella remaining.

I am not the first to come up with this idea, but I will say that I fancy myself a genius for adding in hazelnuts. I think it makes them extra crunchy, and since the bar mix is a bit softer from the added fat in the nutella, the nuts provide a nice contrast.

gluten free nutella rice krisipie treats
6 tablespoons of butter (use 4 if you want the more standard rice krispie bar harder crunch)
1 bag of marshmallows
1 cup of nutella
5 cups of gluten free rice cereal (I used Erewhon)
1 cup of roasted hazelnuts roughly chopped
2 pinches of kosher salt (option, but really makes this more awesome)
parchment paper or cooking spray

1. In a microwave safe bowl, melt the butter.
2. Roll the butter around the bowl and up the sides - this will help with clean up later.
3. Add in the marshmallows and melt them in the microwave, stopping and stirring with a rubber scraper every 30 seconds.
4. Once the marshmallows are melted and fully incorporated with the butter, add in the nutella. You want to stir this in and make it one with the marshmallow/butter mixture. You will need to microwave it once or twice for 10-20 seconds to keep the mixture warm and smooth.
5. Add in the cereal and nuts and stir, stir, STIR. (You might need to reheat the mixture for 10 seconds to keep it going. Really stir, cover all the bits with delicous molten goo)
6. Pour mixture out onto a well greased or parchment(better) lined pan. With the scraper spread mixture out till it is less than 1" thick. (If you put another piece of parchment paper on top, you can push the mixture out with your hands or something heavy like a smaller pan.)
7. Allow the treats to cool before cutting.
8. Bring to the beach and enjoy. 

Thursday, February 23, 2012

Gluten-free pumpernickel, almost there

This is my fourth attempt at gluten-free pumpernickel; its still not quite right. The last time the flavor was spot on, but it was too moist. This time, its a little bit dry. The inevitable Goldie Locks solution cannot be far away.

The first time I saw teff flour, I was pretty insistent that it looked like rye. My first go at fauxpernickel, I learned the major difference between the two - teff is partially fermented. My first loaf smelled like gym socks while dough and tasted quite sour when baked. Try #2 was a bit better. I cut the amount of teff down, to less than half the total flour content, which decreased the sourness, but also made it taste more like a generic loaf of multigrain bread, than pumpernickel. Try #3 was greatly improved by the addition of golden raisins and more teff, but the middle was "soggy-ish" and required toasting for it hold up to even a smidgen of butter to be run across its beautiful crumb.

Try #3 - too wet
2 1/2 cups preferment
1/2 cup canola oil
1 1/2 cup teff
3/4 tsp xanthan gum
2 tsp psyllim hush
2 tbsp flax seed meal
1 tsp salt
1 egg
2 tbsp honey
2 tbsp water - to loosen the batter

(The wed dough looked like chocolate pudding, but is the consistency of soft frosting.)
**
The best thing I learned from Try #3, was the addition of psyllium husks to the batter, in addition to the flax seed meal.  (Psyllium husks are the same ingredient in Metamucil, and if you have ever left a glass of that on your counter, you know their power to turn water into slimy sludge. Sounds gross, but totally helpful in binding together gluten-free flours.)

I also discovered that allowing the pre-ferment to go for more than 2 days, allowed time for the yeast flavors to develop beyond gym-sock-sour.


Here you can see the baked loaf. About half teff flour, plus a mix of millet, rice, potato starch, tapioca starch and arrowroot starch. It is dotted with golden raisins and sunflower seeds. The crumb is pretty even. The taste is on-point. The only problem - the texture. There is no push/give when one bites into it; it sort of crumbles. I think I might go back to adding an egg, or some oil (both I omitted in this batch). Other suggestions?

Wednesday, February 1, 2012

Gluten free beer bread

I have to give a nod to my friend Rena on this lemonade of an idea: gluten free beer bread. There have been several new-to-me gluten free beers that I have tried lately... but I have not liked nor blogged about them. I find that all gluten free beers fall into one ore more of these categories:
-too sweet
-not carbinated enough
-almost no noticeable hops
-wine-like flavor, rather than a beer-like flavor

I do have hope, Dogfish Head is going to release a new gluten-free beer: Tweason'ale. Till then, I have some bottles knocking around in the back of the fridge that need a purpose, thus it is bread making time!

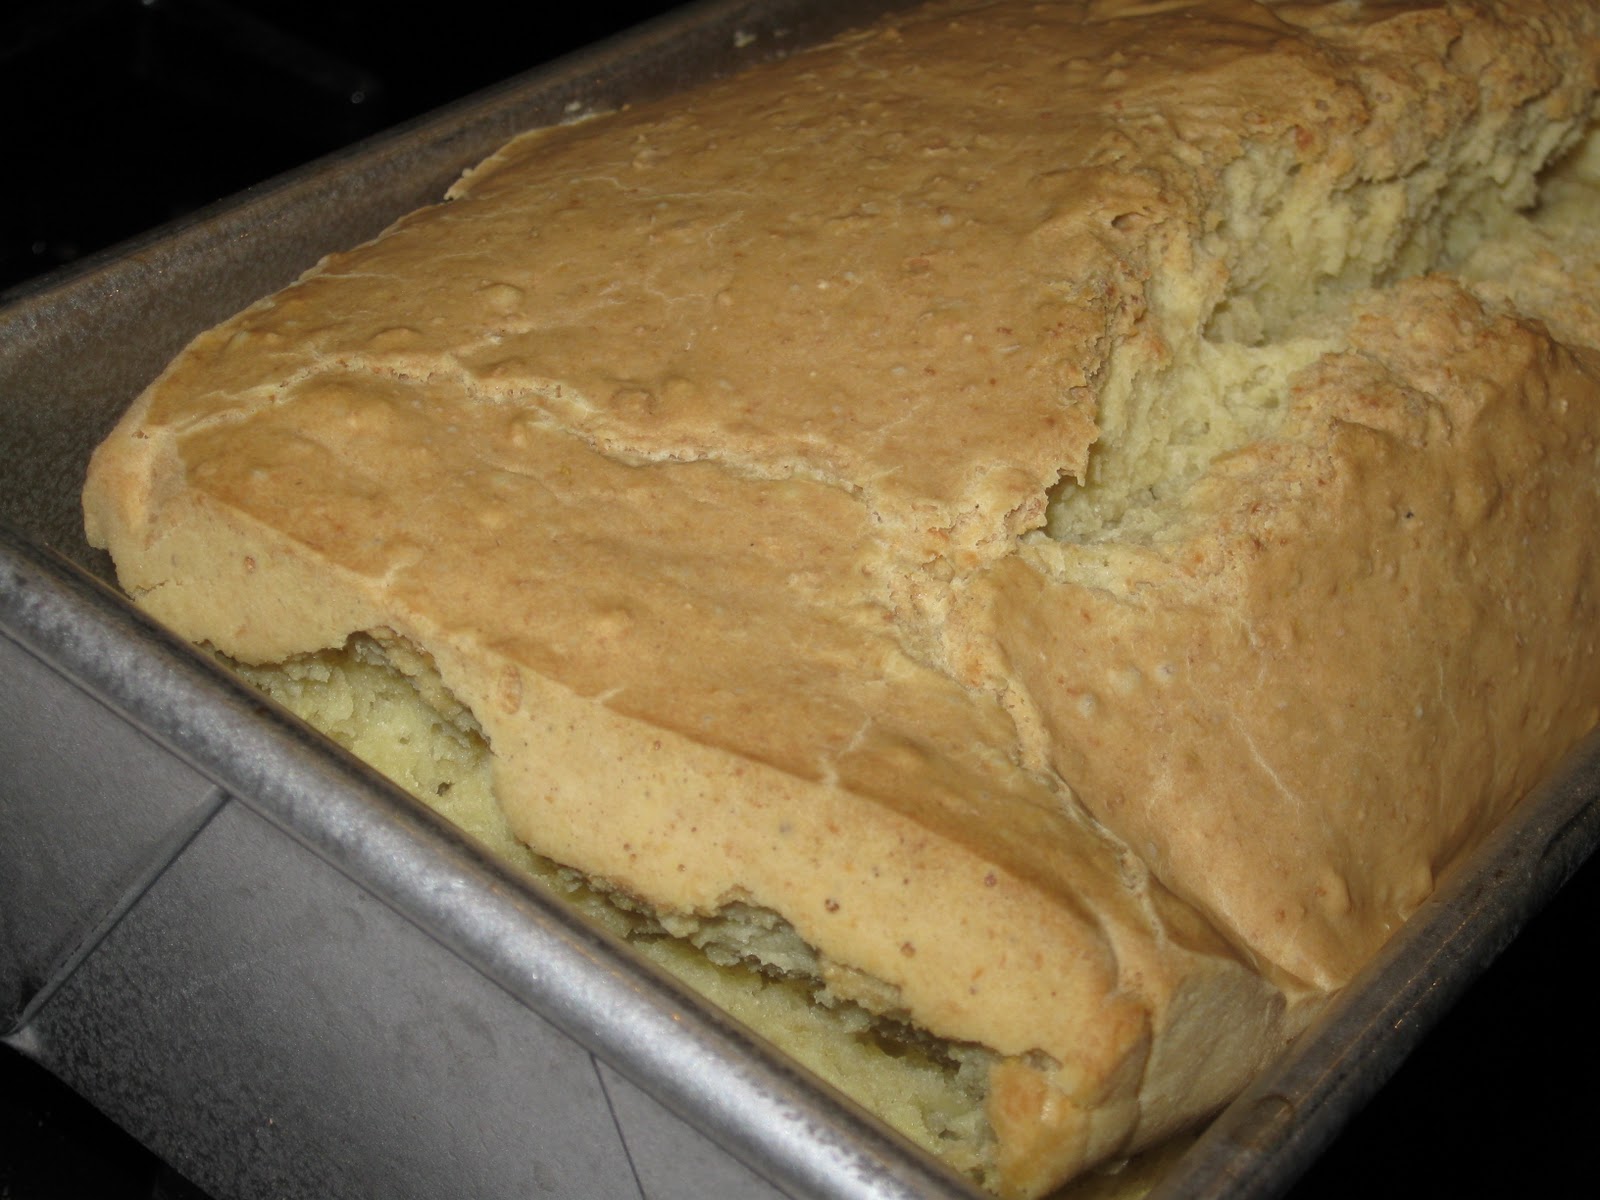
So here is my first semi-failed attempt at beer bread. You can see it exploded, and then collapsed, and then when fully cooled became a doughball.


Honestly, I felt like I was gluten free bread baking for the first time. See the uneven crumb! The saddness of a falling loaf! This, my friends, is grounds for improvement!

Tuesday, May 3, 2011

Pi ... a little late

 
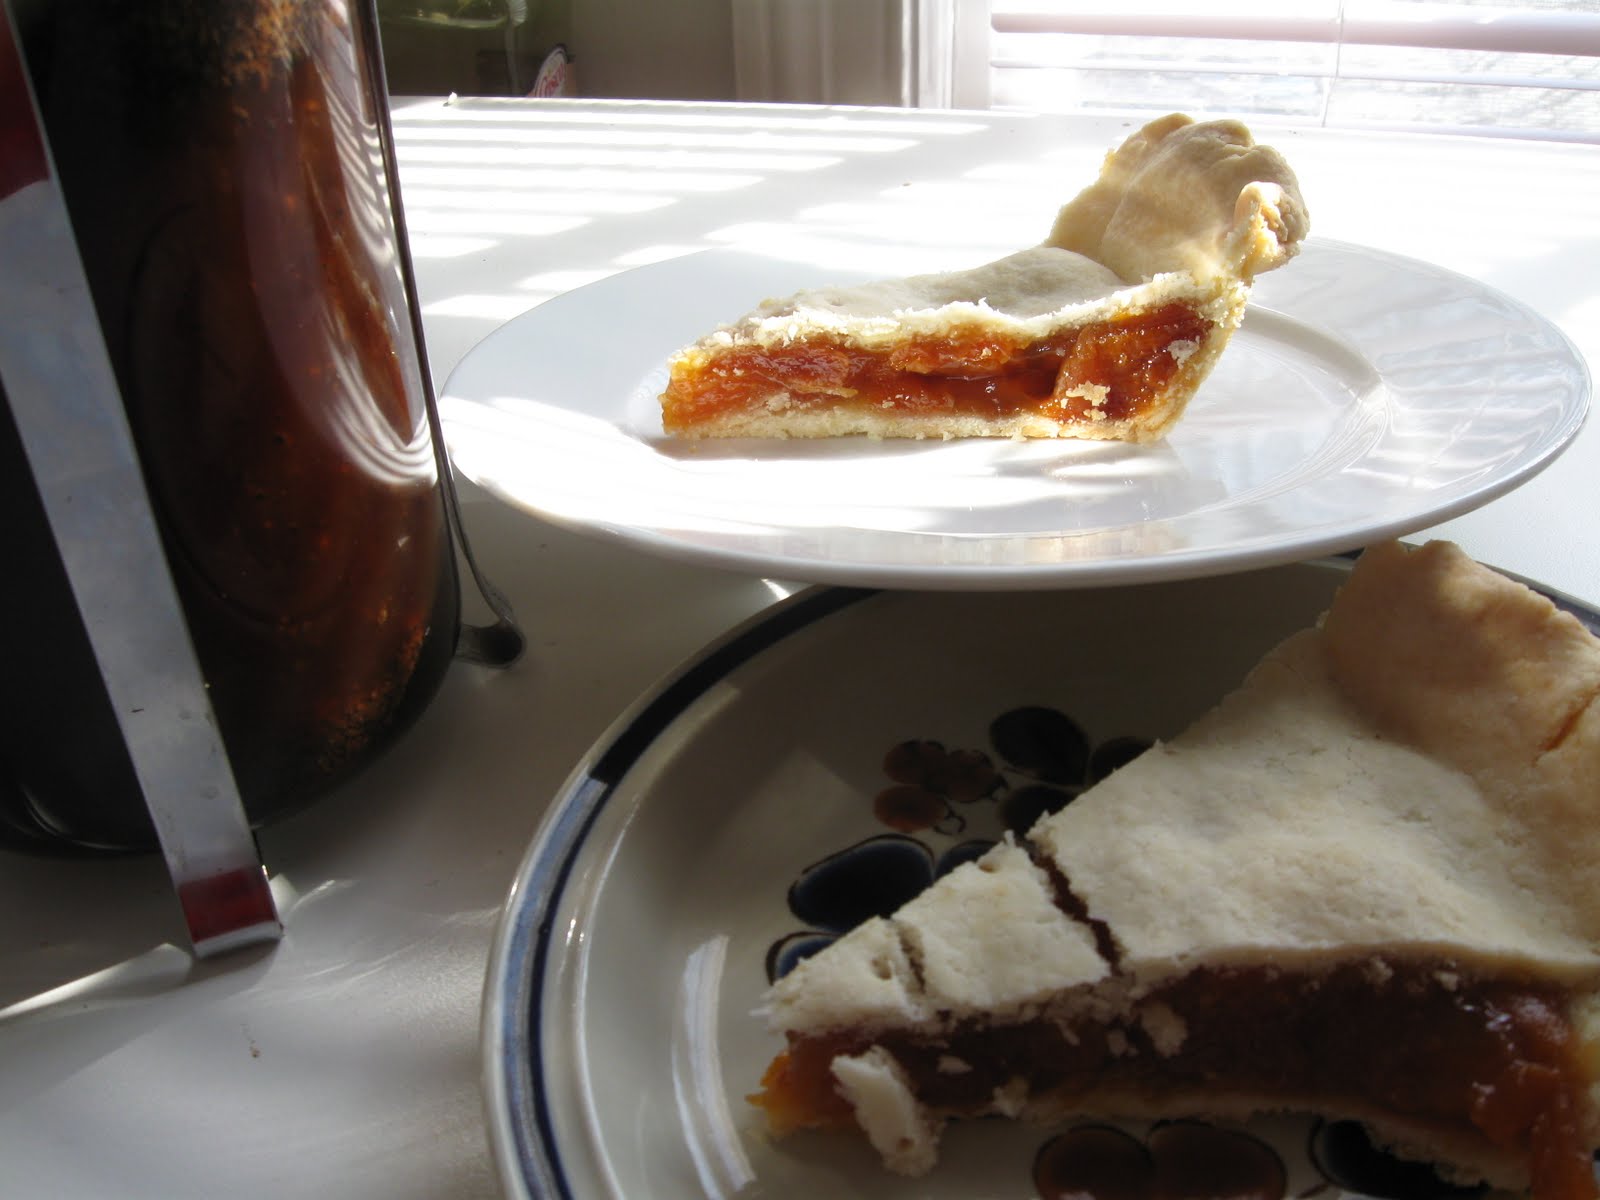
Pie is better than cake. I am not even going to entertain the idea that you are reading this and disagreeing with me. I have only once ever gestured towards a brawl over a difference of opinions, and let's not break my track record.*  Pie is glorious and should be celebrated weekly, if not daily, but alas, not all have realized the awesome potential of pie. I, like many others, see March 14 as a great day to celebrate the best dessert, the best dish ever created.

There was a point in my life when I was pretty good at math. I was "that girl" who took advanced calculus in college, for fun. (I know, my river of dork runs deep and has many unexpected turns.) Pi, the 3.14 variety, was something I was grateful became integrated into graphing calculators. I still sort of miss my TI-83, but mostly for the Tetris. 

Pie crust
1 cup sweet rice flour
1/3 cup tapioca starch
2/3 cup potato starch
2./3 cup corn starch
3 tsp sugar
1 tsp baking powder
3 tsp xanthan gum
1 tsp kosher salt
1 cup unsalted butter
1 eggs
2 tsp apple cider vinegar
1/4 cup half and half
ice water

1. Mix all dry ingredients together.
2. Cut cold butter in to pieces, cut into dry ingredients until the largest pieces of butter are about the size of peas.
3. In a separate bowl, whisk the eggs and vinegar.
4. Pour the wet ingredients into butter mixture. Mix together.
5. Wrap in plastic or place in zip-top bag and refrigerate for at least 20 minutes.


Apricot Filling
2 cups dried apricots (slab kind are tarter)
2 cups water
1/2 cup sugar
1 tsp apple cider vinegar
1/4 tsp salt
4 tsp corn starch

1. Combine the apricots, water, sugar, cider vinegar, and salt.
2. Bring to a boil, lower to a simmer and cook uncovered till the apricots plump and half the liquid is gone.
3. Remove the apricots, set aside, and reserve the liquid.
4. Whisk the cornstarch into the remaining liquid.
5. Bring to a simmer and cook until the liquid thickens.
6. Add the apricots back in and allow to cool.


Putting it all together
1. Divide dough in half. Roll dough out between 2 sheets of parchment paper. Dust the dough first with tapioca starch if a bit sticky.
2. Add in the filling.
3. Roll the second piece of dough to form top crust.
4. Crimp edges and dock top (make steam vents, perhaps in a dorky math symbol)
5. Bake at 350F for 45-60 minutes or until golden brown.
6. Allow to cool completely before cutting.
7. Enjoy with strong coffee.


*I really should apologize to Marisa and our other guests that lovely evening at a piano bar, where we brought the average age of the audience down by 40. It was not appropriate for me to go to such extremes to explain my position that Frank Sinatra - womanizing aside - is far superior to Tony Bennett in every way possible. But honestly, I bet Marisa likes cake.

Friday, February 4, 2011

gluten free soft pretzels


I walked a fine line between these two recipes and came up with something nearly perfect. The texture is SPOT ON. The flavor needs a little work. I think the dough needs to proof another time, get more yeasty and less rice or corny. These were fantastic hot, eaten the in the German style, split open with butter. Some really strong grain mustard and a little honey also was delicious. They didn't keep super well the next day, but I threw the left overs in the toaster oven and enjoyed a harder, crunchier version. This gives me some very specific thoughts about bagels... yes, bagels.

Soft Pretzels
1 1/2 cups water
2 tbsp instant yeast
2 cups sweet rice flour
1 cup corn starch
1 cup potato starch
1/4 tsp salt
4 tsp xanthan gum (yes, this much)
**
a few tablespoons of oil for rolling out the dough
2/3 cup baking soda & 10 cups water for boiling the pretzels
kosher or sea salt for sprinkling on the pretzels

1. Combine the water and yeast, let proof. (10 minutes or so)
2. In a separate bowl, combine the dry ingredients and mix well.
3. Add the dry into the wet and mix.
4. USE A DOUGH HOOK FOR THE FIRST TIME IN OVER 3 YEARS
5. Scrape the dough down and cover with plastic wrap or a wet towel. Allow to proof until it has doubled (maybe an hour or so, more if your kitchen is cool)
6. With well oiled hands, pull off balls of dough and shape them into sticks. (I tried for the traditional pretzel shape, but the dough is not resilient enough, so finger-thick sticks it is.)
7. Allow these sticks to proof, doubling in size - about 20-40 minutes.
8. Bring the 10 cups of water and 2/3 cup of baking soda to a boil. (Preheat your oven to 500F)
9. One at a time, place the dough sticks into the boiling water.
10. Remove after 30 seconds - you will notice a color change (darker dough) and they will puff up a little)
11. Sprinkle with salt and bake at 500F for about 6-10 minutes - this really depends on how thick your dough is. You are going for brown with some golden brown on the edges. Blistering is a good sign. You can take them darker if you like.
12. Enjoy them warm!

Marvel at the crumb structure. Eat too many and lie on the couch rubbing your belly (optional).

Thursday, January 27, 2011

Cardamom Apple Muffins


Apple Cardamom Muffins
1 1/4 cup brown rice flour
3/4 cup sweet rice flour
3/4 cup potato starch
1/2 cup almond meal
1-2 tsp flax seed meal (optional)
1 tbsp baking powder
1 tsp xanthan gum
1/2 tsp salt
1/4 tsp ground cardamom (more would be nice)
3/4 cup sugar
1/4 cup brown sugar
1 stick unsalted butter
2 eggs
1 1/4 cup almond milk
1 tsp vanilla extract
3 cups chopped apples

350F oven
1. Combine the dry ingredients, mix well, set aside.
2. Cream the butter and sugars.
3. Add the eggs, one at a time. Make sure each is well incorporated before adding the next one.
4. Alternate adding the dry ingredients into the mixture with the almond milk and vanilla - three additions is fine. Make sure to scrape down the bowl between each addition.
5. Fold in the apples.
6. Portion out into lined muffin tins.
7. Bake at 350 for 25-35 minutes or until a toothpick inserted into the center of the muffin comes out clean. (Its a good idea to rotate the pans half way through baking if your oven heats unevenly. Lets face it, most do.)

These were good. The texture is light, the apples did not break down and are a nice sweet burst. The cardamom is pretty light, but I was afraid of overwhelming the muffin. Next time I will double it, or sub in 1 tsp of cinnamon.

Saturday, January 22, 2011

gluten free rugelach

My first encounter with rugelach was back in the 90s when I worked at a Barnes & Noble Cafe. Authentic, no; delicious, yes. The internet tells me that you can built them like a crescent roll, but I have always preferred the rolled-into-a-log and sliced type.

For this recipe, I modified two different gf versions and fuddled with the fillings. (Apricot is my hand's down-favorite, but I didn't have any on hand.) Cinnamon +sugar+walnuts is the classic; I did a version with almonds here. Prune is another standard; I mixed dried prunes with lingonberry jam to stretch the 10 I had into enough for these treats.

The results... far exceeded my expectations. The edges are crispy, the centers are soft, toothsome and the fillings stayed in side and did not ooze out all over the pan! The vanilla extract is not necessary, but was noticeably awesome with the cinnamon sugar version. I will be adding these to the "so good I could serve them to other humans and not have to disclose they are gluten free, but will, with joy and elation" list.

Gluten Free Rugelach
yields 20-24 cookies
Dough
1/2 cup brown rice flour
1/2 cup sweet rice flour
1/4 cup potato starch
2 tbsp arrowroot starch (or corn starch)
2 tsp xanthan gum
4 oz. cream cheese (half a package)
1 stick unsalted butter (8 tbsp)
1/2 tsp salt
1 tsp vanilla extract (optional)
1/4 tsp baking powder
1 egg or 2 tbsp milk or cream for brushing tops
1 tbsp sugar for sprinkling

Prune Filling
10 prunes, chopped
2 tbsp lingonberry jam (use what you have folks)

Almond Filling
2 tbsp sugar
1 tbsp brown sugar
1/2 tsp cinnamon
2 tbsp chopped almonds

1. In a food processor, combine the dry ingredients and pulse.
2. Cut the butter and cream cheese into chunks and one at a time, add them to the dry mixture, pulsing a few times between each chunk.
3. The dough is going to look weird and like it will never come together. It will, just wait and keep pulsing.
4. When it starts for form clumps, add in the vanilla extract, if you so choose. Keep pulsing till it forms a ball.
5. Remove the dough from the processor. Work it with your hands until it comes together. Separate it into two balls and refrigerate for 10-30 minutes.
Here is where you can mix up your fillings.
6. Roll out the dough, one ball at a time, until the dough is about 1/6" thick. Using parchment is key here, it will help in step 8.
7. Spread out the filling, leaving 3/4" of blank dough around the edges.
8. Slowly roll the dough on itself, keeping the roll as tight as possible. The parchment paper is super key here because the dough is really soft.
9. Repeat with second ball of dough and filling.
10. Place the rolls into the freezer for 10-20 minutes. This is key so you can slice the dough without squishing everything flat and spewing the middles out everywhere.
11. Remove the dough from the freezer and slice into 1" cookies.
12. With either a beaten egg, milk or cream, brush the tops of the cookies. Sprinkle with sugar or left over cinnamon sugar mixture.
13. Bake at 375F for 25-40 minutes (this is going to depend on how big your cookies are and how even your oven is). You are looking for browned tops and browned edges. The cookies will rise slightly and appear flaky on the top.
14. Cool and enjoy [with coffee].